KNOWLEDGE BASE
General Information
The Knowledge Base records knowledge and procedures that are applied, for example, by operators when solving incidents, and can also be useful for your customers.
Before registering an article (procedure), you first need to create a Space and a Category to which the article will belong. For the steps of these procedures, please see paragraphs below. Adding an article is preceded by creating a draft, which is then approved and published by the person responsible for the space.
If the Knowledge Base module does not appear in the menu, check Global Settings->Knowledge Base to see if the module is enabled. If it is and still does not appear, check your access permission. Access can be set in Users and Groups->choose a user->Permissions tab->Knowledge Base.
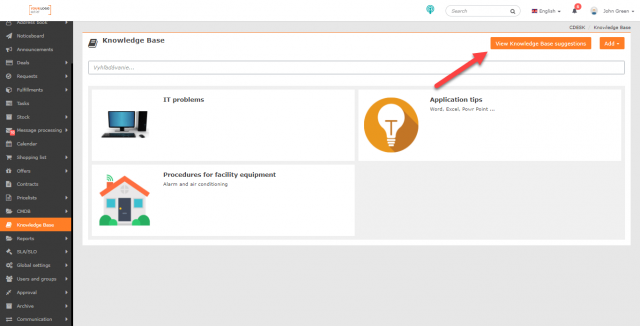
Opening the Knowledge Base module takes you directly to the list of spaces. At the top of the window there are buttons for displaying the drafts of the Knowledge Base as well as for adding Spaces and Articles. The search bar can be found bellow these.
Add a Space
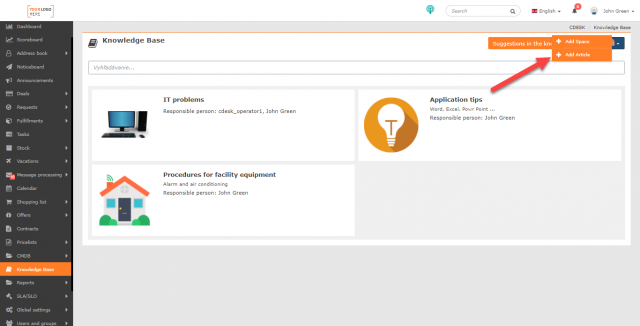
To add a new space in the Knowledge Base, click the ADD button in the upper right corner. When clicked, the Add Space and Add Article. options appear. Click on Add space.
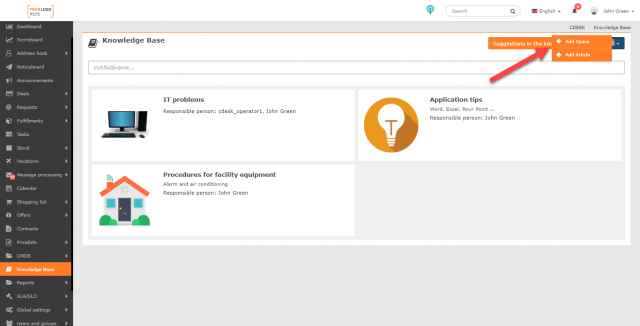
If the Add Space button is not displayed, check your permission to add spaces. It can be set in Users and Groups->choose a user->Permissions tab->Knowledge Base->Space.
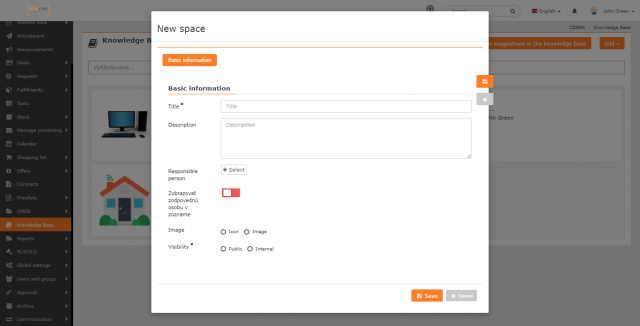
After clicking the Add Space button, a new window opens to enter the space parameters. Required items are marked with •.
Title • – a title under which the space is displayed.
Description – a further description of the space. It can summarize the content of the articles included within the given space.
Responsible person – click to select the user responsible for the space. The space is accessible to the environment admin, creator of the space and the responsible person.
Show responsible person in the list – the switch has to be on ![]() .
.
Image – this setting offers two options:
- Icon – when clicked, a button appears to select an icon and the icon color.
- Image – when clicked, a field appears to select an image.
Visibility •– setting of the space access:
- Public – the space will be accessible also to users without the CDESK login. This feature is currently unavailable and will be implemented later.
- Internal – the space will only be accessible to users with the CDESK login and with the permission to access the space. Permissions can be set in Users and Groups->choose a user->Permissions tab->Knowledge Base->Space
Edit a Space
Only a user with the permission can edit a space. Set it in Users and Groups->choose a user->Permissions tab->Knowledge Base->Space.
To edit a space, click on the icon in the upper right corner.
Click to open a form with the space parameters. You can change all the settings. To save your changes, click the Save button in the bottom right corner. Use the Cancel button to exit the form without saving the changes you have made.
Add a Category
Before creating an article, it is necessary to set up a category in which the article will be placed. There are two ways to create a category:
- Using the form to create a new draft – in the Category line there is an icon + to add a new category. (For more information on how to create a Draft, see the text below.)
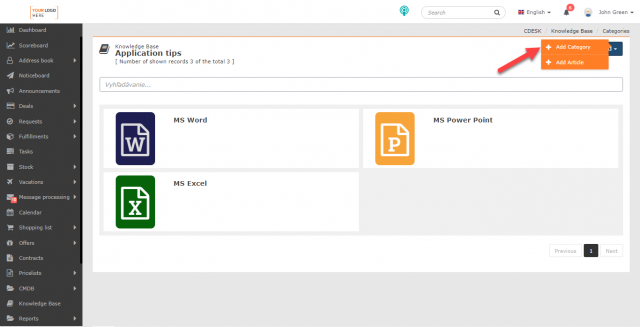
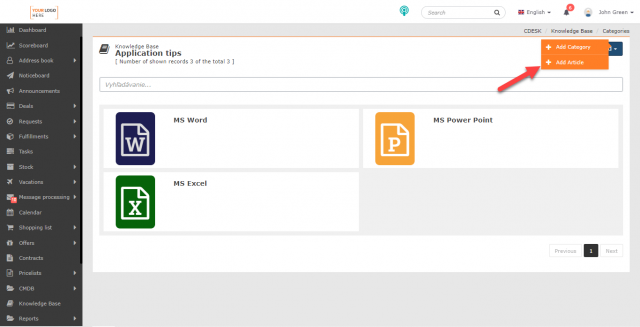
- Using Space – open a space. (For more information on how to create a Space, see the text above.) The Add button is located in the top right corner. When clicked, the +Add Category and +Add Article options appear. Select the +Add Category
If the buttons for adding categories are not displayed, check your permission to add categories. Set it in Users and Groups->choose a user->Permissions tab->Knowledge Base->Categories.
In both cases, the form to enter the category opens. It contains the following fields. Required fields are marked with •.
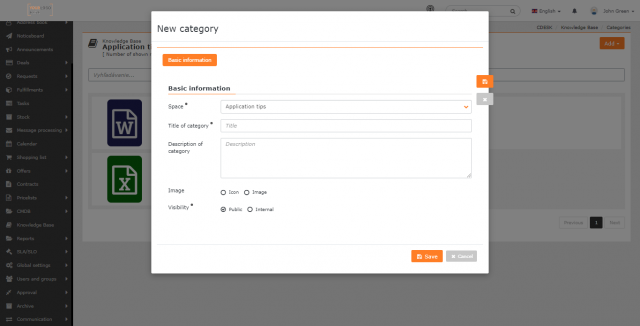
Space • – this field is pre-filled with the space through which you are adding a category. If you are adding a category via draft to the Knowledge Base, the field space will be pre-filled with the space through which you are adding a draft. The pre-filled space can be changed. Click to open the list of all spaces in CDESK.
Category name • – a title under which the category is displayed.
Category description – a further description of the category. It can summarize the content of the articles included within the category.
Image – this setting offers two options:
- Icon – when clicked, a button appears to select the icon and the icon color.
- Image – when clicked, a field appears to select the image.
Visibility • – setting of the category access:
- Public – the space is available also to users without the CDESK login. This feature is currently unavailable and will be implemented later.
- Internal – the space is only accessible to users with the CDESK login and with the permission to access the space. Permissions can be set in Users and Groups->choose a user->Permissions tab->Knowledge Base->Space.
Edit a Category
Only a user with the permission can edit a category. Permissions can be set in Users and Groups->choose a user->Permissions tab->Knowledge Base->Category.
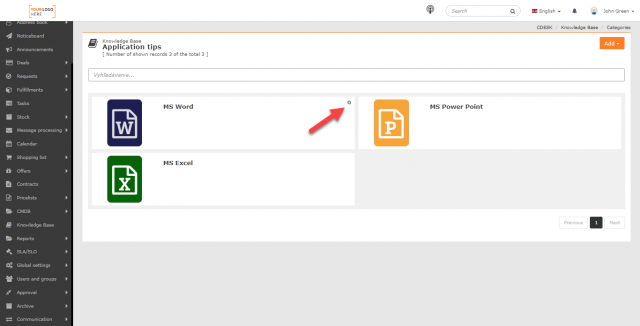
To edit a category, click on the icon in the upper right corner.
Click to open a form with the category parameters. You can change all the settings. To save your changes, click the Save button in the bottom right corner. Use the Cancel button to exit the form without saving the changes you have made.
Add a Draft
There are several ways to add a draft into the Knowledge Base:
- Using the list of spaces – The Add button can be found in the upper right corner. When clicked, the +Add Space and +Add Article options appear. Select the +Add Articlee
- Using the list of categories under the space – Open a space to access the list of categories under the space. The Add button can be found in the upper right corner. When clicked, the +Add Space and +Add Article options appear. Select the +Add Article
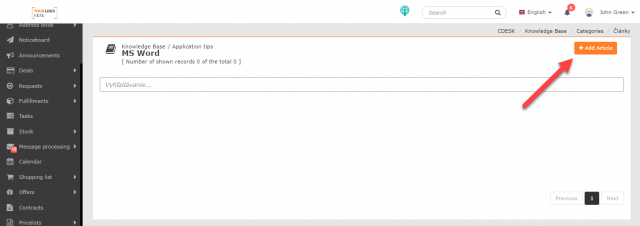
- Using category – Open a space to access the list of categories under the space. Then open the category you want and click +Add Article.
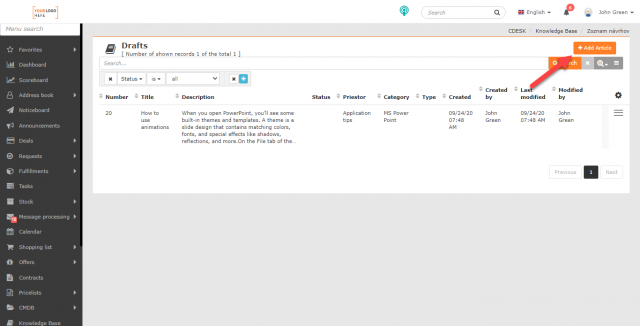
- Using the list of drafts – go to the list of drafts and click the +Add Article For more information on the list of drafts, see the text below.
The button to add drafts and articles is only displayed to users with permission to create a new record. Set it in Users and Groups->choose a user->Permissions tab->Knowledge Base->Records.
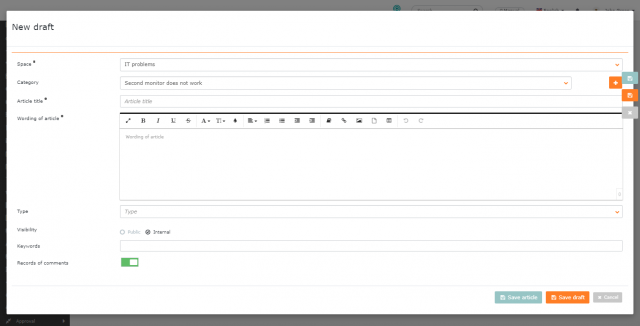
Click the +Add Article button to open the form for entering a new record. Required fields are marked with •.
Space • – select a space under which the record will be classified. If you enter the record via list of categories under a specific space, or via category under a space, the space will be pre-filled. This setting can be changed by clicking in the field.
Category • – select a category under which the record will be classified. If you enter the record via category under the space, the category will be pre-filled in the field. This setting can be changed by clicking in the field.
Article title • – a brief and apt description of the article.
Wording of article • – article content.
Type – the type selection field only appears when creating a record from the list of categories under a space or category. The types defined in Global Settings->Knowledge Base can be selected.
Visibility – this option only appears when creating a record using category. This feature is used to set access to the record.
- Public – the record will be accessible also to users without the CDESK login. This feature is currently under development and will be implemented later.
- Internal – the record will only be accessible to users with the CDESK login and with the permission to access the space. Set it in Users and Groups->choose a user->Permissions tab->Knowledge Base->
Keywords – this option only appears when creating a record from the list of categories under the space or when creating a record under the selected category. Keywords are to identify articles. They can be used to search a record using the full-text search.
Records of comments – this option only appears when creating a record from the list of categories under the space or when creating a record under the selected category. If the switch is on ![]() , it is possible to add comments under this draft when saved as an article. For more information on the saving draft procedure, see the text below.
, it is possible to add comments under this draft when saved as an article. For more information on the saving draft procedure, see the text below.
To save your draft, use the Save draft button located in the bottom right corner. Click the Cancel button to close the form without saving the record. After saving the draft, you will be automatically redirected to the list of drafts where you can save the draft as an article.
List of Drafts in the Knowledge Base
To open the list of drafts in the Knowledge Base, open the Knowledge Base module. You are then redirected to the list of Spaces you have access to. To view the drafts, click the Drafts in the Knowledge Base button located in the upper right corner of the window.
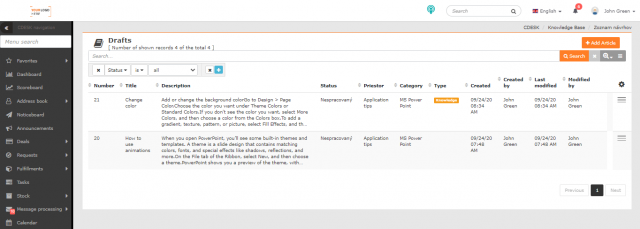
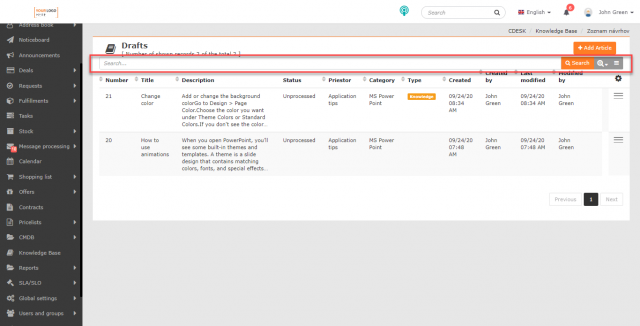
When clicked, a window opens with all the drafts you have access to.
In the upper right corner, there is a button +Add Article , which is used to add articles. There is a full-text search bellow. For more information on searching the list of drafts, see the text below.
Edit a Draft
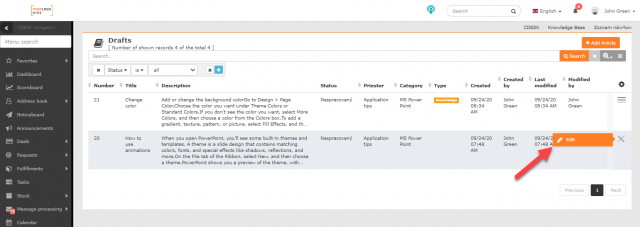
To edit a draft, click on the context menu and select Edit. Once clicked, the form opens as when entering a draft. You can edit all fields.
Only a user with permission can edit drafts. If the user does not have the permission, the edit button is not displayed. Set it in Users and Groups->choose a user->Permissions tab->Knowledge Base->Records.
Save Draft as an Article
There are two different ways to save draft as an article:
- Save draft as an article directly when you create it, if you have permission to do so.
- Go to the list of drafts, search and open a draft.
In both cases, the draft must have the Category and Type fields filled. Once they are filled, the Save Article button becomes available in the bottom right corner of the record. Click to place the record as an article under the selected space and category.
Comment on an Article
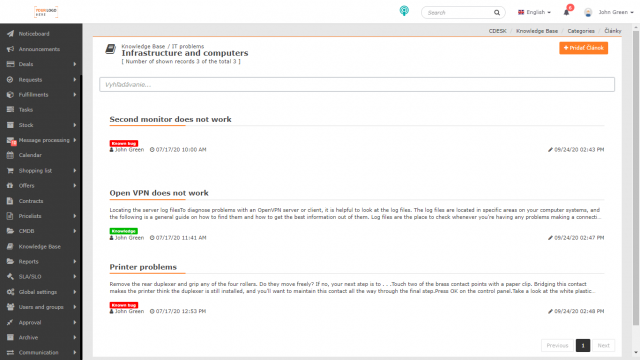
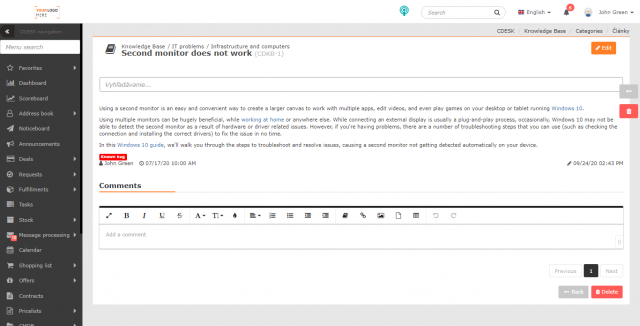
Once saved, the article can be edited, deleted and comments can be added. The article can be accessed by opening a specific Space, then by opening a category under the Space. Open a category to view the list of articles under the category. You can also search for an article directly through the full-text search.
Each article is assigned article type and keyword flags for better identification.
Click on the title to open an article.
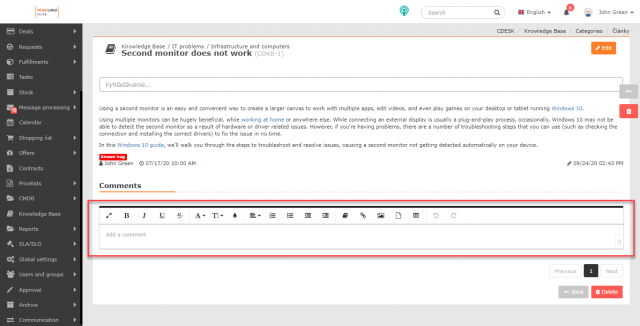
Below the article, there is a text field to enter comments. It can be used to post remarks on the article.
Edit and Delete an Article
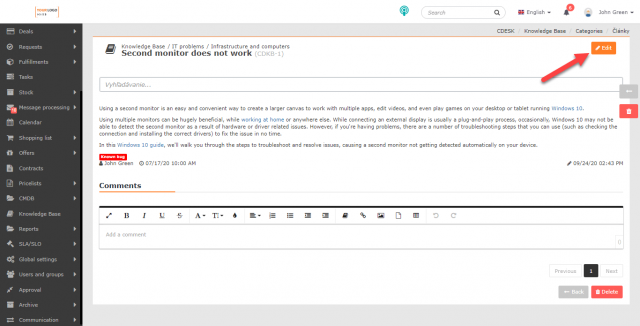
To edit an article, click the Edit button in the top right corner. Once clicked, the same form opens as when entering a draft. You can edit all fields of the form except Space and Category. Only a user with proper permission can edit an article. To set permissions, go to Users and Groups->choose a user->Permissions tab->Knowledge base->Records.
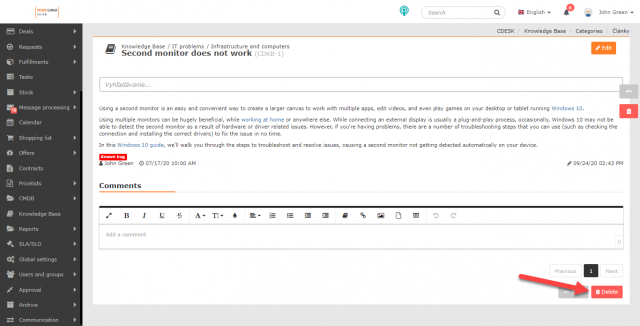
To delete an article, use the Delete button in the bottom right corner. Once clicked, a window opens notifying you that the article is going to be deleted. Click Delete to delete. Select Cancel to close the window without deleting the article.
Search
Search in Drafts
In the upper right corner, there is the +Add Article button which is used to add articles. The full-text search can be found below where you can search by the following criteria:
- Number
- Title
- Wording of article
- Space
- Category
It is also possible to use an advanced search that allows you to filter results according to these criteria:
- Any column
- Category
- Title
- Wording of article
- Space
- Status
- Type
- Time of creation
- Created by
- Last modified
- Modified by
For more information on the search, see Search and advanced filters.
Search in the list of articles
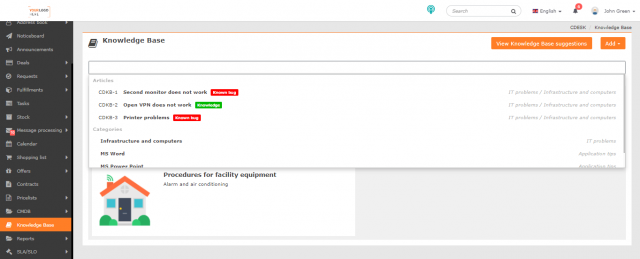
Open the Knowledge Base to view the list of Spaces. At the top of the window, there is a search bar. Here you can search by:
- Article Title
- Keyword
- Category

