BASIC AUTHENTICATION TO CDESK USING MS ENTRA ID
Page content
Authentication with Microsoft Entra ID is used to increase security and simplify logging into CDESK. You can connect to CDESK using MS Entra ID within 15 minutes. You must have your own CDESK/CM Server domain to use this feature.
You can configure authentication either only for users from your MS Entra tenant (single-tenant) or also for external users from other tenants (multi-tenant). Login for external users (multi-tenant) is supported since CDESK version 3.2.6 and is described in the article MS Entra ID – Multi-Tenant authentication.
For authentication to work, the organization must have an Office 365 tenant with established accounts for users. The accounts do not need to have an Office 365 license. Authentication only requires that the user has a valid email address registered in the tenant that they actually use (because of the activation link). This address does not have to be part of Office 365, it can be an external email service. In this case, however, the domain of this service must be configured in the Office 365 environment, which you will need to arrange with your IT department.
The procedure for setting up a single-tenant connection is described below.
Adding the MS Entra ID Authentication API connector in CDESK
The first step to create a connection is to add the MS Entra ID Authentication API connector in CDESK. Go to CDESK→ Global Settings→ Connectors, API. This will open a list of connectors and APIs that are currently configured on your CDESK server. To add an MS Entra ID connector, click on the +Add connector button located in the top right corner.

When clicked, a new window opens with the connector type selection. Select Microsoft Entra ID Authentication and click Continue.

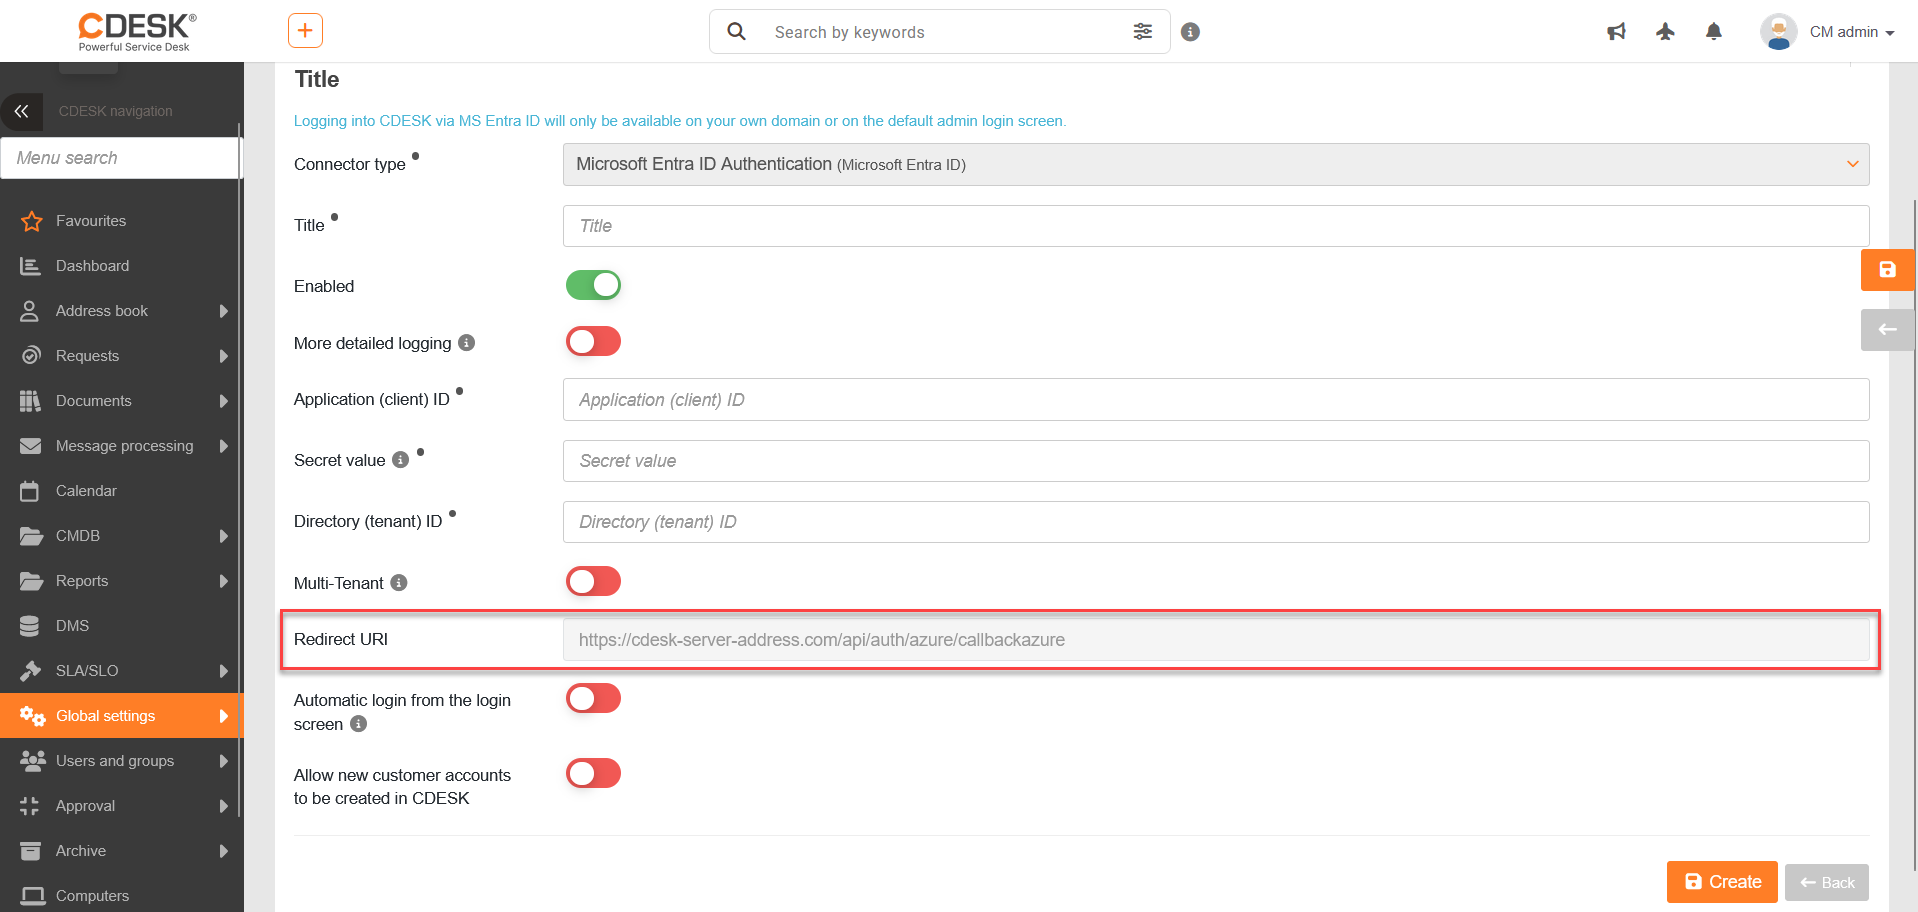
The form for configuring the MS Entra ID Authentication connector opens. Fields marked with a • symbol are required. Description of each field:
Connector type • – Automatically pre-populates the connector you selected in the previous step.
Title • – The name by which the connector will appear in the connector list.
Enabled – Enable or disable connector activity. Disable if you do not want to use the connector.
More detailed logging – Used in the event of authentication problems. Only enable after consultation with the CDESK vendor’s support staff.
Application (client) ID • – You can find this value in the MS Entra ID settings. The procedure is described below in the section Linking the CDESK environment to the MS Entra ID tenant.
Secret value • – You can get this value in the MS Entra ID settings. The procedure is described below in the section Linking the CDESK environment to the MS Entra ID tenant.
Directory (tenant) ID • – You can get this value in the MS Entra ID settings. The procedure is described below in the section Linking the CDESK environment to the MS Entra ID tenant. Only required for single-tenant setups.
Multi-Tenant – Enable this option if you want to authenticate users from other Office 365 tenant environments. Setting up Multi-Tenant authentication is described in the article MS Entra ID – Multi-Tenant Authentication.
Redirect URI – Address automatically generated by CDESK. It is used when registering CDESK application in MS Entra ID. It specifies the address that will be accessed via MS Entra ID after successful authorization. You will enter this address in the registered application in MS Entra ID.
Automatic login from the login screen (True SSO) – If enabled, the user will be logged in immediately after entering the CDESK/CM Portal address without having to click the Office 365/Entra ID button.
Allow new customer accounts to be created in CDESK – If enabled, users from enabled domains who do not yet have an account in CDESK will be able to create a user account after successful authentication via MS Entra ID. The setup of this feature is described in more detail in the article Self-service Creation of Customer Accounts.

Registering the CDESK application in MS Entra ID
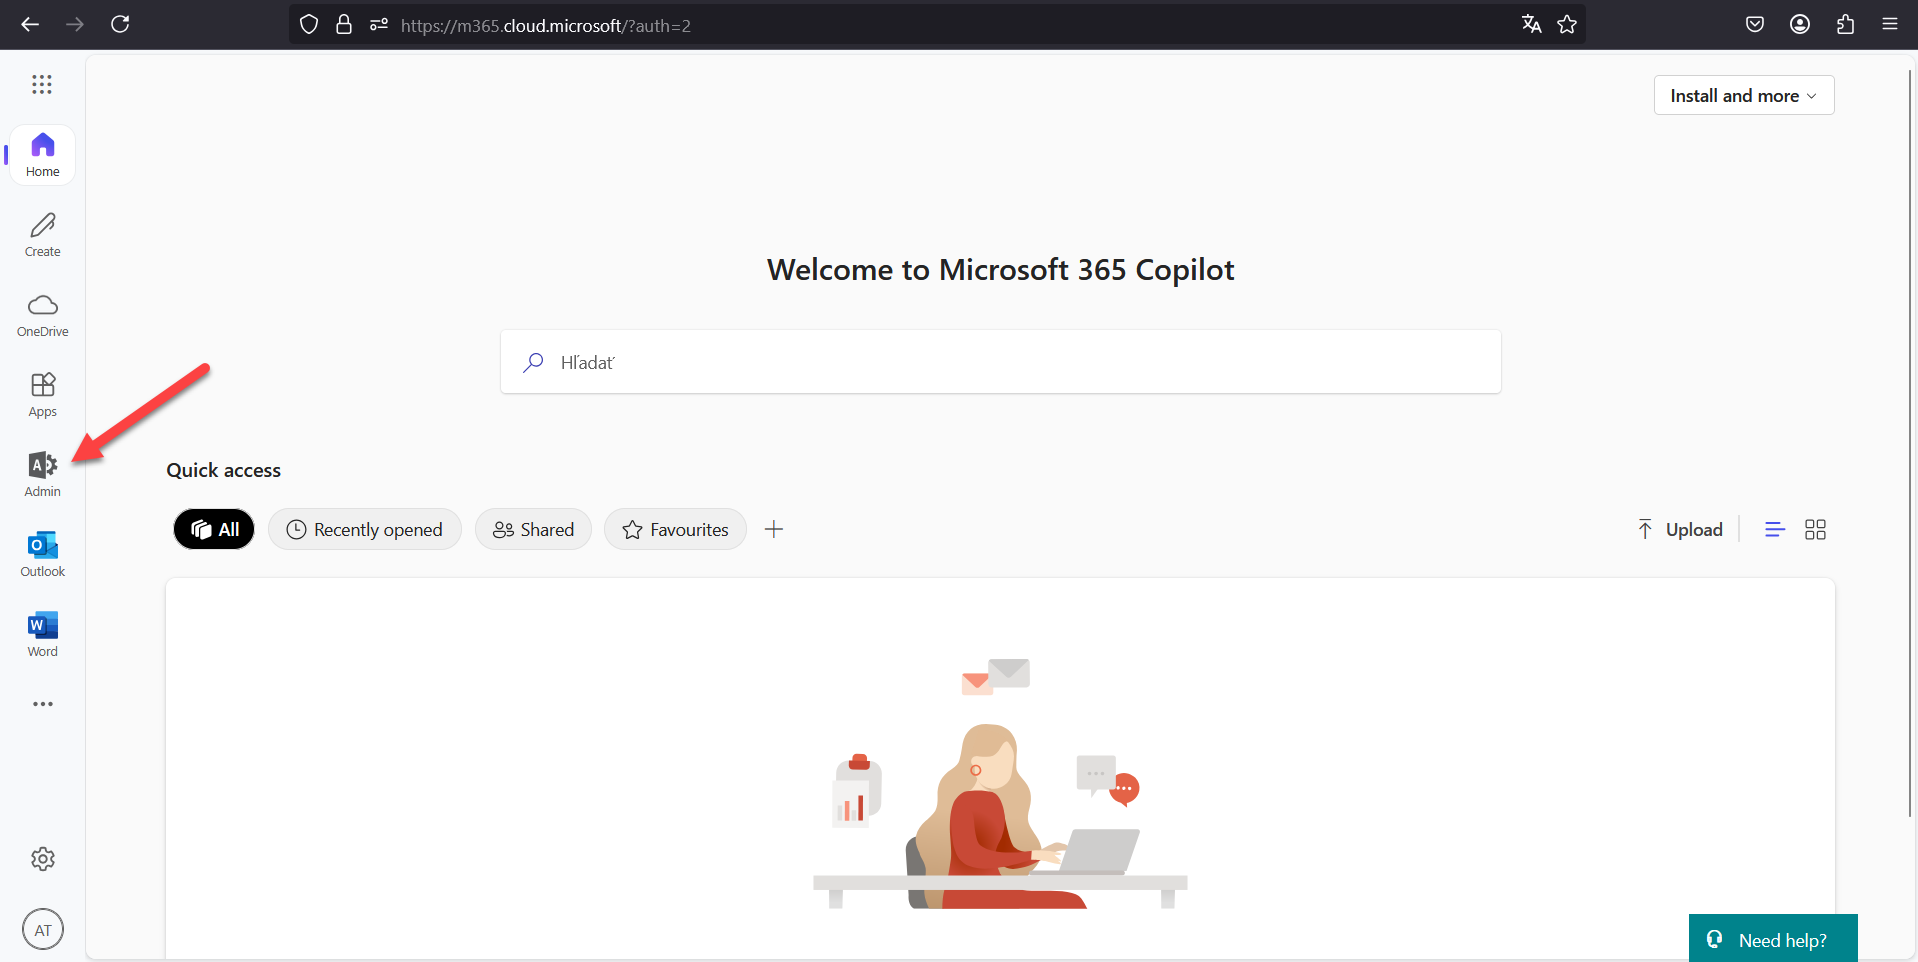
To obtain the Application (Client) ID, Directory (Tenant) ID and Secret Value data, you need to register the CDESK application in the MS Entra ID. Go to office.com and log in with an Office 365 account that has permission to manage the MS Entra ID. In the Apps menu on the left side of the window, locate the Admin application.
Click to open the Admin splash screen. From the menu on the left, select Show All. From the expanded menu, click Identity.

A new window will open. Select App Registrations from the left-hand menu. Then select +New Registration to register a new application.

When clicked, the window for registering a new application opens with the following items:
Name – text field for entering the name under which the registration will appear in the list of registered applications.
Supported account types – set whether authentication is performed for other tenants. Select Accounts in this organizational directory only (your company only – Single tenant).
Redirect URI – select the Web option and copy the Redirect URI from the MS Entra ID connector API settings in CDESK into the text box (next figure).
To register your application, click on the Register button located in the bottom left corner below the list.

Linking the CDESK environment with the MS Entra ID tenant
After registering your application, you will be taken to the Overview section where your registration details will be made available. Copy the Application (Client) ID and Directory (Tenant) ID data into the form to configure the API connector for authentication using MS Entra ID in CDESK.

To complete the connector configuration, you must enter the Secret Value. Go to the Certificates & Secrets section, located in the menu on the left. Click the +New Client Secret button and select the expiration time of the code. We recommend two years. You can enter a description in the Description field. Click the Add button to generate the code.

Once the clicks have been created, the generated code will appear in the Client Secrets list. Click Copy to Clipboard, navigate to CDESK, and paste it into the Secret Value field in the MS Entra ID connector form.

Once you have entered all the necessary information into the form, save the settings by clicking on the Create button at the bottom right.

Linking the CDESK user account to the MS Entra ID
Go to Users and Groups→ Users. In the list, open the user account you want to link and scroll down to the General Settings tab.
After the configuration of the MS Entra ID connector is complete, the Logging in via MS Entra ID – use the contact email switch is enabled by default in all accounts, i.e. the set contact email is used for authentication.
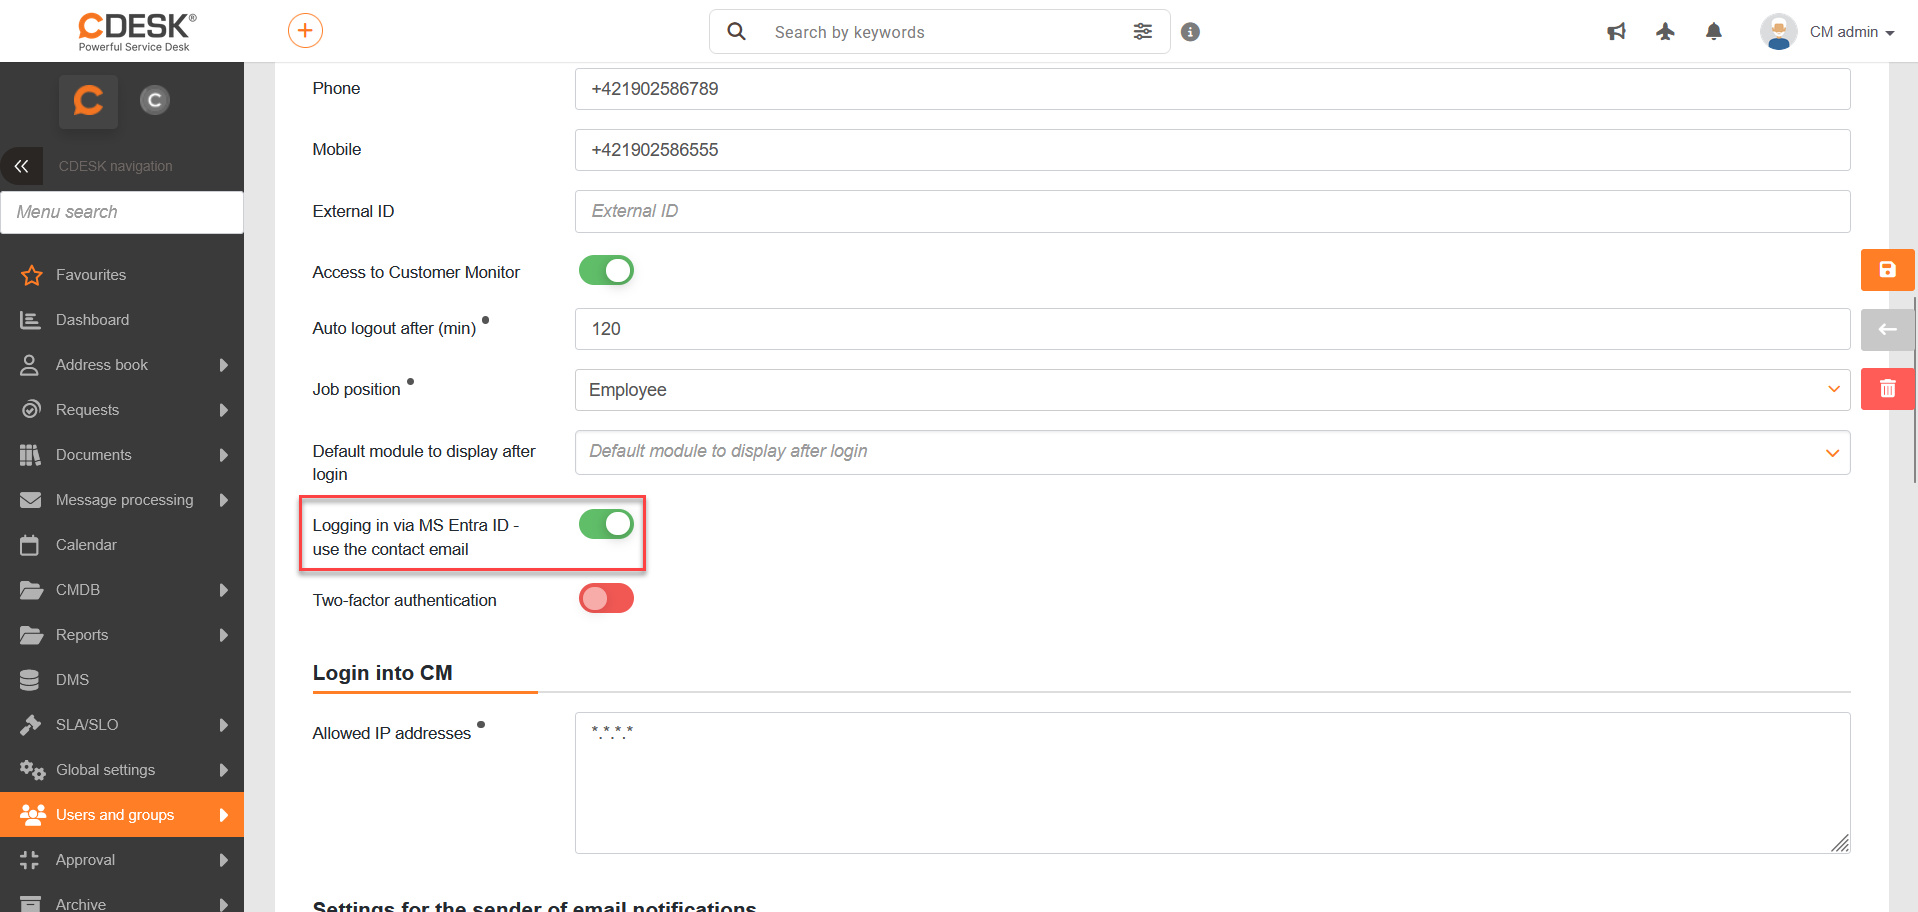
However, if you need to use a different email, disable the switch and enter the email in the Entra ID account email for sync field. In both cases, the email used must be the one that the user also has in the MS Entra ID. Save the settings using the Save button in the bottom right corner.

Logging into CDESK using MS Entra ID
Once the MS Entra ID connector is configured, the CDESK login screen will display a button to log in using Office 365 / Entra ID.
If you click it, you’ll be taken to the Office 365 login page where you’ll be asked to authenticate with your credentials. If you are already logged in, the authentication will be automatic and you will be immediately redirected to CDESK without having to re-enter your credentials.

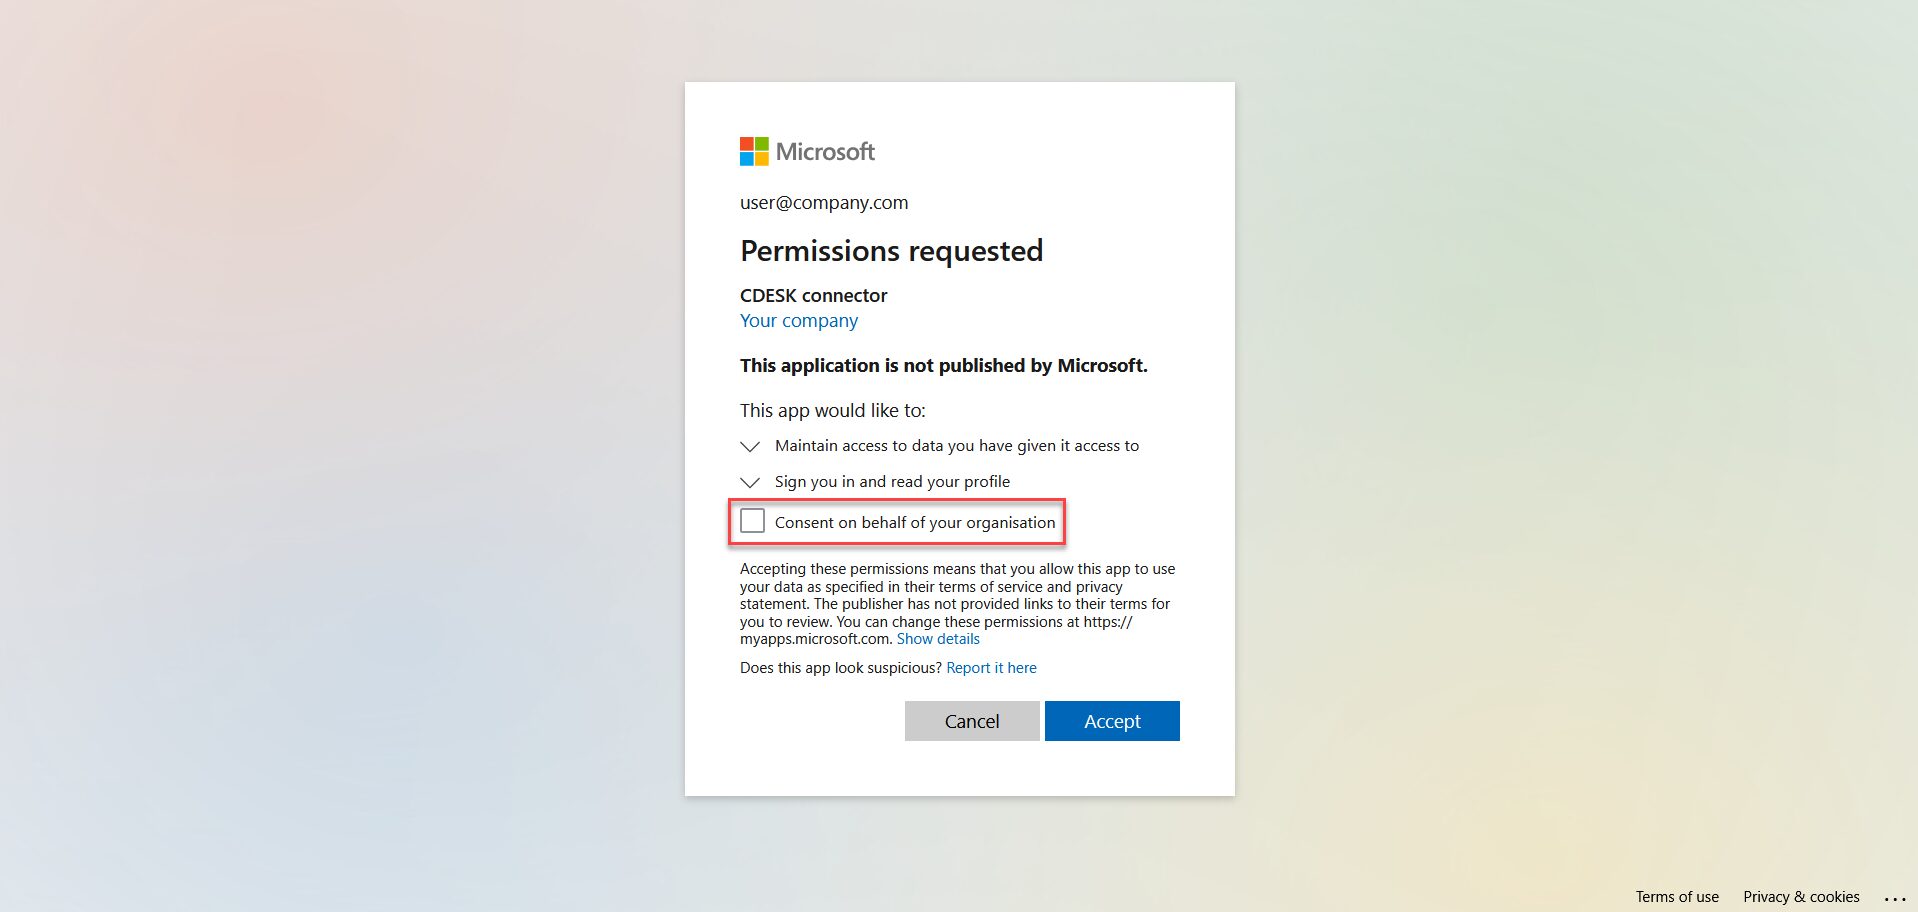
Granting application permissions on first sign-in
Please note that when a user logs in for the first time, Microsoft requires application permissions to be granted. The tenant administrator can check „Consent on behalf of your organization“ at the first login, which will grant Admin Consent for the entire organization. This will ensure that the application will work for that tenant without further requests for consent from other users in the organization. Without Admin Consent, each user must grant these permissions themselves.
Admin Consent can also be granted through the MS Entra ID portal, in the Enterprise Applications section, where you select the application, go to the Permissions section and click on Grant admin consent for your company.
